|
I just thought I would share a my top ten tips for when you are going through a home building process or a renovation. It is so easy to get screwed over in the construction industry. It's usually not over just nickles and dimes. It can often be the difference between your dream home and your worst nightmare.
3. Find a good contractor Do your research before hiring a contractor. Don't just look them up on the internet. A company with really strong marketing, doesn't necessarily mean they are quality builders. Just because a picture or a website or ad looks great, doesn't mean that it's not photo-shopped or even a picture of their work. Ask around. Have your friends just built a new house or gone through a renovation? Talk to them about their experiences in dealing with a certain company. Would they do it again? Any problems they encountered? Word of mouth really is an important aspect of the construction world. Visit the company's show room or shop. Ask to see their portfolio of work, and make sure the buildings have actually been built, not just rendered pictures. They could have a great designer on staff, but if their workmanship is not in the field, it's best to move on. Visit the sites of the actual buildings they have built, and take note of the quality you would expect them to deliver. Again, get quotes. This is where people get screwed over. If you do decide to go with a certain company or contractor, get everything in writing. Make sure you have legal documents and contracts. There are different times to pay for certain things, so know exactly what is due and at what point. NEVER pay the entire amount until the work is finished, and you are satisfied. Deposits should be around 50-60%, and no more. Make sure everything is accounted for, and this is where you need to be sure that you have a honest contractor. 50-60% would be a lot to walk away with on a $100,000 budget. Yikes. I can't even imagine. I'd even recommend going so far as to hire them for a little project before hiring them on a big project, just so you really know their work ethic and integrity. 4. Get second opinions In the construction world, it's not only normal, it's encouraged, to get at least three quotes from different contractors. That gives you a feel for the different guys out there, and let the best man or woman win. Remember that the cheapest option is not always the best option. Often, the cheapest quotes have forgotten something, and then is added later on the invoice. Make sure you watch for this. Having three quotes to compare is helpful too, to make sure that nothing gets missed. The middle quote is usually the one to go for- not too cold, not too hot, juuuust right. (I think I've been reading too many story books.) Once you've hired a contractor, and something seems not right to you, feel free to get a second opinion before it's too late. Sometimes contractors can be moody about this, being a pride thing, so try doing it discreetly. If something doesn't seem right about the work that is going on, chances are you are right. Better to nip it in the butt before it turns into a messy and sometimes legal mess. A second opinion can either calm your nerves and let you know that everything is OK, or it can confirm your suspicions about your contractors work.
A) The plumbing for the bath faucet needed to be removed, which meant ripping out drywall and patching it, and changing the plumbing. Also the drain for a tub is in a different position than a large walk in shower. That needed to be changed as well. B) Having a shower base instead of a bath meant the need for more tile on the walls. The difference in height between a shower base and a tub is about 2 feet. Doing the math here: The difference in square footage was about 22 square feet. (3'x2'x5') Using a mosaic tile, which is around $25/ sf= a difference in about $550. That's just for the tile. No tile edge, no extra grout and tile adhesive, which are small costs, but it adds up. C) The bath tub and bath/ shower fixture combo was already ordered. Often, you cannot return special orders, so this would be an extra expense. Hopefully, another bathroom could use the bought and paid for fixtures. 7. Be Involved It doesn't hurt to be aware of what is going on with your renovations. This is a good way to make sure the project is going as planned. You wouldn't want to walk into your house to find missing walls or extra walls because someone read a drawing upside down. Imagine if you told someone a paint colour and they misheard you and your house was bright orange or something. Mistakes happen, and if you have a clear idea about what's going on in your house, it's easier to pick up on mistakes before they become a big deal. Being around is also a good way to appreciate the workmanship that is happening. I always think it's neat to see the project before, during, and after.
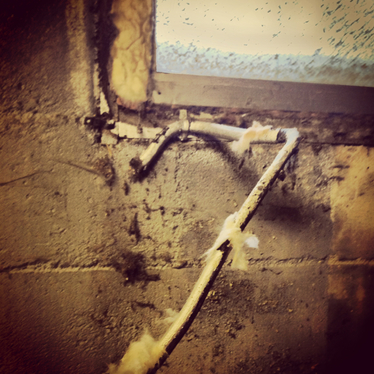
10. Be safe There are two parts to this safety rant. Firstly, if you are doing it yourself, make sure you know what you are doing, and that what you are doing is safe and done correctly. Don't do things that you are uncomfortable with or things that are unsafe. Get help when you need it. Unless you are very handy and know what you are doing, I would stay away from doing any electrical work yourself. Ideally, electrical work should be permitted and it would help to avoid circumstances like below. I was helping my friend remove a basement wall, and as soon as we had ripped off the paneling, I see this cut wire among the insulation. Not cool. Thankfully, with a closer look from a distance (yes, that is contradictory), I realized the wire was cut on both ends and just left there, so it was not a live wire just hanging out, starting fires. Thankfully. It's not always the case. We were lucky. Secondly, if you are getting the work done by someone else, and they come across a safety issue, such as mold, rot or structural issues, this needs to get fixed. It is not your contractor trying to screw you over. In fact, it is them looking out for you. As much as this sucks for the budget, it is important to fix it. Safety first, my friends! I hope this helps when picking out a contractor when renovating or building. I don't like seeing people getting screwed over in this industry. Life can be pretty ruthless sometimes, so if this saves you a headache, then I've done my part. Home is where the heart is, and it shouldn't be a traumatic experience to get your home the way you want it.
Happy Building! Jena xo
0 Comments
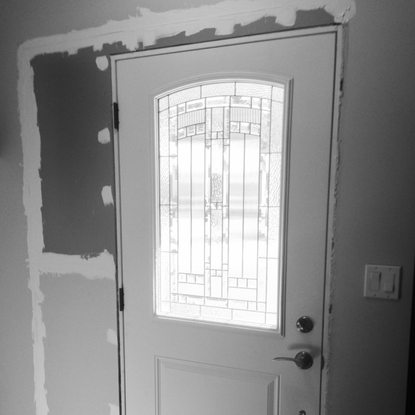
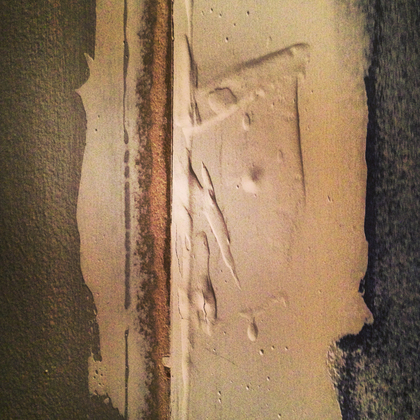
I'll just start with a quote. "You think you can do these things, but you just can't!" -Finding Nemo, 2003 As is the case with me and drywall. Well, it's not that I can't, but it is that I don't know how to do it. Not yet. Not at all. If you remember, a few months back, we were getting our house assessed about how energy efficient our house has become after all our renos. It was the morning of, and of course, there were so many tiny things that I hadn't done yet, but thought should be done before the assessment. The major thing they were testing for was air tightness. I wasn't there for the original assessment pre- renovation, so I didn't get to ask how certain things would affect the ratings. Things like the drywall seams... Since I hadn't asked, I figured it was probably a huge deal, and now that it was the day of the post assessment, I totally just slathered those seams with drywall mud, sans drywall tape. I did that with the first door too, however, it got covered by the trim. This time, our drywall patching was not getting covered by the trim. The door originally had a sidelight, so there was no getting away with a crappy drywall job this time. I don't know if you picked up on this, but I said a few months back. Ya... After Adam lovingly pointing out that I did it very wrong, I felt pretty unmotivated to fix it. It was going to be a killer to sand. I slathered that mud on really, really, really thick. But I finally got at her. The sanding part at least. I am definitely going to use the following instructions with the drywall joint tape and hope for the best. If at first you don't succeed, learn how to do it right, I guess. That patch of wall will be finished soon, I can feel it! The tools of the trade!
Any drywall horror stories to make me feel better? Please!?
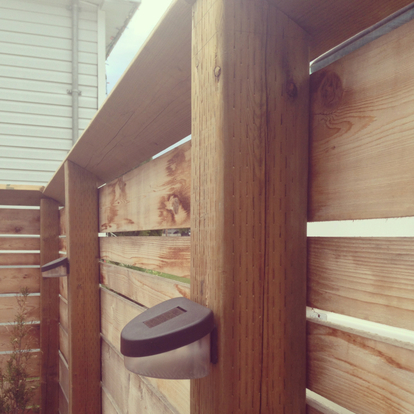
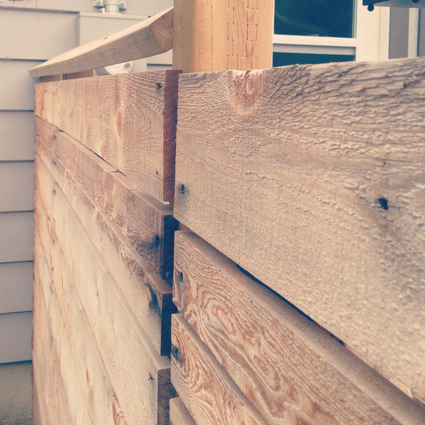
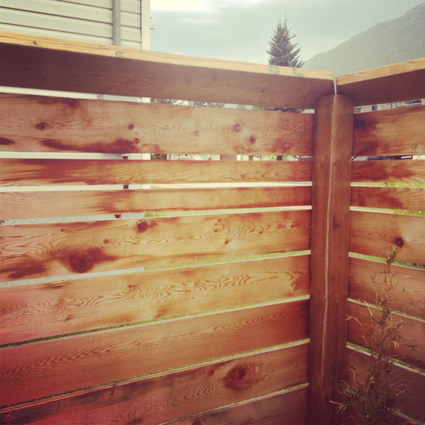
Happy Drywalling! Jena xo Ok, so one of the first things we did to our house when we bought it was build a fence. We had been loving our entire pregnancy at Adam's parents (bless them for putting up with us!) and so the least we could do for our dog was to give him a yard to run around in. I'll admit, it did happen after the little dude was born... Priorities suddenly diverted from the dog. Sorry, Bo. At least he had a little girlfriend next door. Thankfully, we had practise building one other fence before, but this time we decided for a bit of a different design. Instead of doing the typical vertical fencing, we chose to do our fencing horizontally. This meant more vertical support, aka more posts, which meant more holes to be dug. Our posts were spaced 4' apart, which is definitely overkill for a vertical fence, but for a horizontal fence it was perfect. This is to prevent the boards from bowing. It also provided us with a perfect amount of vertical posts for solar lights. Nice ambiance, let me tell you!
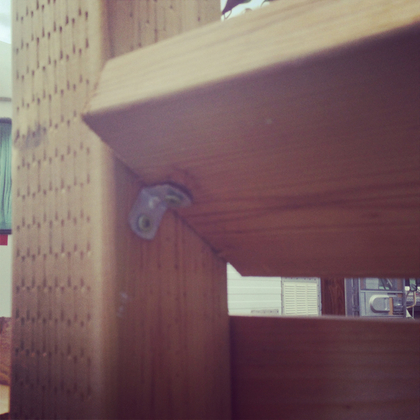
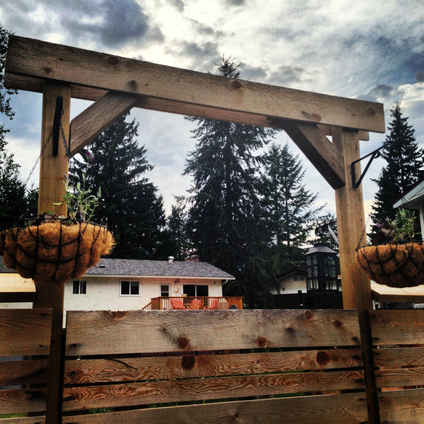
We also topped the fence off with a diagonal capping piece to allow the snow to slide off instead of piling on top of the fence. Snow is a pretty integral factor in the design of the fence. Why, you ask? This was the last fence we built. It was five feet tall. Thus, the snow cap. And the increase in height. It is now just under six feet, and it's been good so far, but we did have a pretty mild winter with only about 4-5 feet of snow on the ground. (We do live in a ski town, might I add)
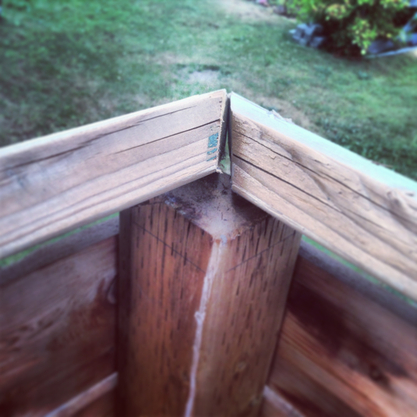
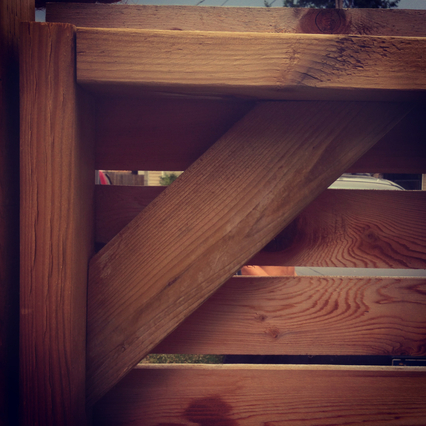
The one tricky part we had with the angled cap was the corner where the two angles meet at the corner post. It was the only thing that was off, and I'll admit, I was so relieved to have the fence up, I just said good enough and we will plant a tree in the corner to hide it. Oops. Normally Adam and I are pretty anal about that kind of thing but we can't all be perfect... It does look fine from the road, so consider yourself lucky that I let you in on our little secret! Hopefully the cool little 1x2 feature at eye level distracts you.
To finish off our gate, I really wanted to make it an interesting feature, so about a year later, we finally finished it off with the left over wood we had. I would have probably preferred it to be a thicker piece of wood; a 1x8 or 10 instead of the 1x6 might be more of the right proportion for the fence, but we used what we had, and I think it still turned out nicely.
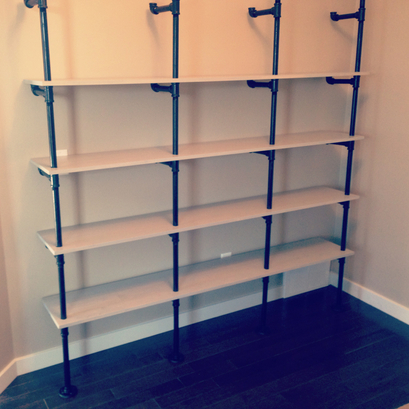
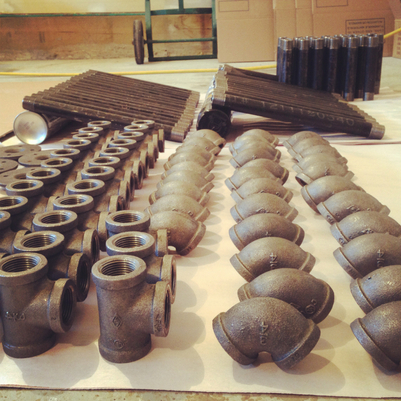
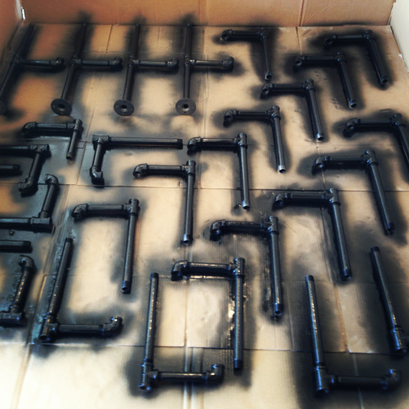
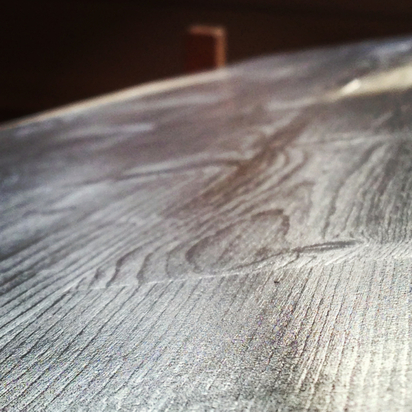
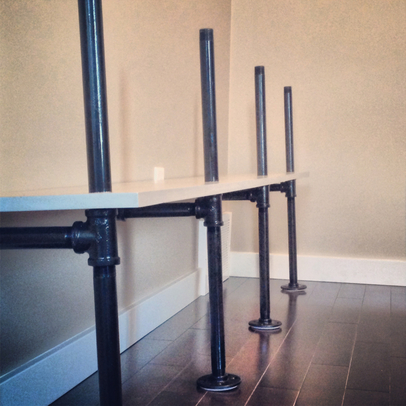
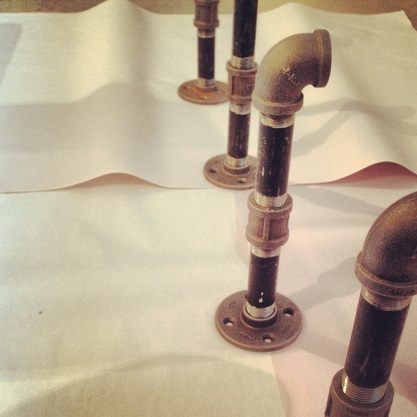
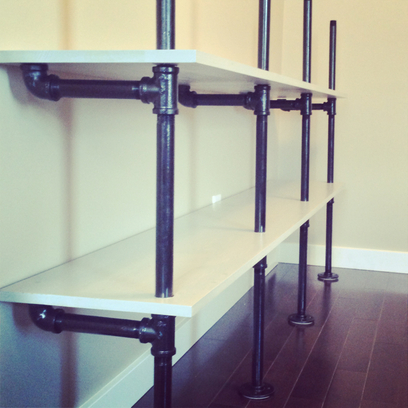
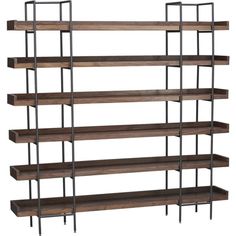
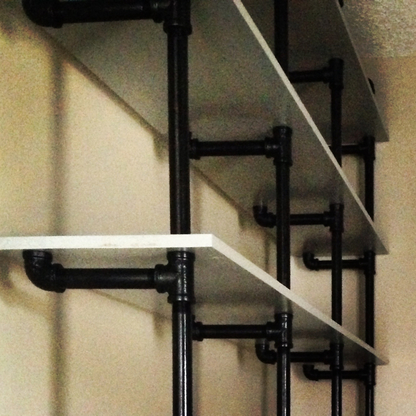
Gates are tricky when building. All I can stress is bracing and levelness. I wasn't in charge or the fence design, so I don't have much I can tell you in terms of how-to. We started with a 2x4 frame, and it went from there. So, there you have it: our fence building in a nutshell! I know its not the norm when it comes to fences, but I love it. Sometimes, you just have to go against the flow and do what you want. So that's what we did. Oh, and P.S. if you are building a fence with pressure treated wood, make sure you use coated screws specifically for decks and fences. Otherwise you will be replacing EVERY SINGLE SCREW. Yup. They rust almost immediately. It's not fun. I thought the black 2-1/2" screws were the coated ones. Those are drywall ones. The kind of greenish ones are the ones to use. Don't make my mistake! Seriously. Happy fencing! Jena xo This is a very cool project done by my great, and clearly crafty, friends, Matt and Erin. I love the mix of industrial materials and wood. I am a huge fan of contrast, you just can't go wrong with it. Black and white, yes and no, hot and cold. Classic examples. Kind of sounding like Katy Perry there. Matt send me this picture below, asking what to do with all these pipes, and immediately, I thought of shelves, which is exactly what they were planning. Great minds definitely think alike. Since this was a project done by Matt and Erin, I had some very serious questions for them. Jena: So all in, about how much do you think this cost you? (Approx?) Matt: $557.56 Jena: Breaking it down, what was the cost of the plumbing supplies? Matt: ~$320. ¾” T’s, 90’s, Flanges, and of course.….6” and 12” nipples. Jena: Big nipples. Jena: What was the cost of the wood? Matt: ~$125 Pine, pre-sanded, tongue and groove veneered. After much searching I selected veneered wood as it seems the most stable and least amount of prep time. It also provides an interesting look with all the random grain structures. Jena: Well, it looks awesome, that searching paid off! Jena: What about paint & other stuff? Matt: ~$110 Jena: What paint (and other stuff) did you use? Matt: 1 Coat - Minwax Water Based Stain, White base with 7 shots of black. 3 Coats - Varathane Semi-Gloss Polyurathane 2 Coats - Tremclad Gloss Black Spray Paint (pipe) 220 Grit Sandpaper Tack clothes Foam Brushes Staining Sponges Jena: Good to know, that lays it out well. Copy and paste. Shopping list done! So, where do I pick up the supplies? I mean, where did you pick up the supplies? Matt: Plumbing - Emco Supply Wood – Windsor Plywwod Paint & Others – Your local hardware store Jena: How long did it take you? This includes beer drinking and breaks... Matt: Probably about 40 man and lovely wife hours! Jena: Any challenges? Matt: Get yourself 4 hands and 2 less beers for assembly. Years ago I swore I would never buy plastic anchors again. Purchase good wall anchors preferably made with metal components. My first ones were plastic junk and blew apart….again. Jena: Are there things you might do differently the next time? Matt: Lights are always fun. It would have been nice to run some wiring through the piping and have overhung accent lighting on the books. It can still be done ;) Because it is 9 feet high, with all the arms are cantilevered, it could have been anchored to the wall somewhere in mid-shelf. A good engineer would have done a free-body diagram and figured this out first! Jena: Any Tips? Matt: Make sub-assemblies like in the photo. Final assembly will be much easier with less chance of wrecking walls and floors. Jena: That's a great tip, I probably would have thought of doing that after I finished putting it all together and my walls needed patching. Any other tips? Matt: Purchase all the gas fittings from one supplier to keep the assembly consistent (they are all NPT thread but the length varies) On a smaller shelf, to save some $, you could use ½ piping. Measure, measure, measure…….measure! I have about a hundred more tips but I don’t want to ruin the excitement of your own build. Jena: So after it was all finished, what was your favourite part about it all? It obviously looks really great! Matt: I love learning how to do stuff. This was my first wood working attempt and it turned out as envisioned. Jena: Your first?! I'm impressed. Clearly, it comes pretty natural to you. Is there anything else for next time? Matt: If it was a center piece, display shelf, or focal point of a room, I would introduce different shelf spacing. This would provide a home for the mixture of art, televisions, flowers, and storage boxes we all have. Jena: That would be really cool, I just might have to either try it out or just get you to make me one! What was your inspiration for this project? Matt: I finally remembered what my inspiration was…..the always overpriced ($1928.69 USD) and often under constructed Crate and Barrel shelf (pictured below). I almost knocked it over checking the price tag so how could I ever put books on it? Jena: Sorry, Crate and Barrel! Looks like handcrafted wins out! This has definitely given me an idea for a piece I'd love to have in my living room! You guys did a great job, and I can't wait to see it in person! Huge thanks to Matt and Erin for sharing this project with me, and
I look forward to seeing more! Stay tuned.... Any projects you have that you'd like to share on my blog? Let me know! And thanks again for reading! Jena xo
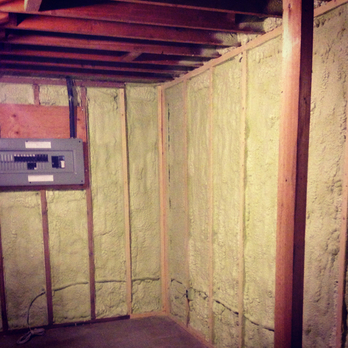
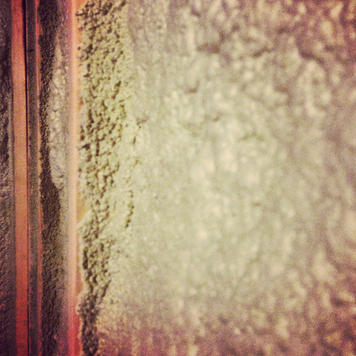
Spray Foaming the Basement
This was a pretty big undertaking, and we definitely brought in the professionals for this one. I am positive it has made a HUGE difference. It was worth the investment, and it will reduce our heating bills dramatically. Totally recommend doing this if you can!
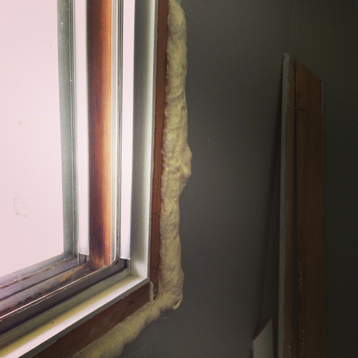
Sealing Windows
One of a houses biggest heat loss is often the windows. Unfortunately, we didn't have it in the budget to replace the windows. Lucky for us, during our pre-assessment, we found out that the windows weren't actually that bad, so I just ripped down the trim, and Adam spray foamed the void around the frame.
It felt a little counterproductive ripping down the perfectly good trim, but from our previous lesson with the front door, I only cried a little ripping it down. There is just something about having the trim down that makes it feel like a construction zone again. Ah well. It's all for a reason! (See my previous post where we replaced our "exterior doors": When One Door Closes... Another One Opens) Say no to Cracks!
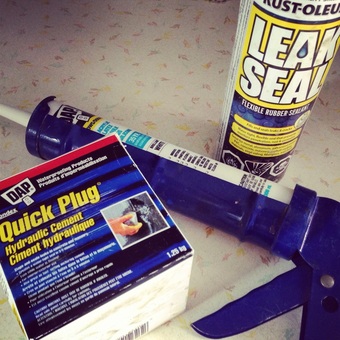
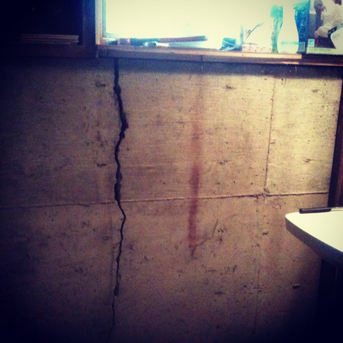
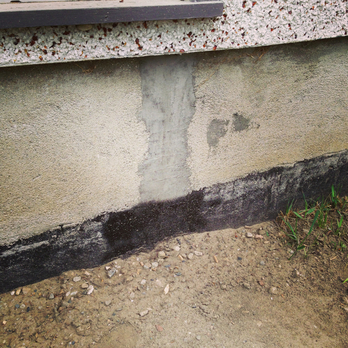
We had a few cracks in the foundation that definitely can't help in the heat loss aspect. So Adam pumped them full of hydraulic cement and fixed that problem. We also used Rustoleum Leak Seal to damp-proof the concrete, even though the Quick Plug Hydraulic Cement is water-proof. One can never be too safe! Just for the record, we used 2 large buckets of the hydraulic cement for our three foundation holes, so if you think this little box fixed our cracks, well, I'm letting you know this is just for touch ups. This wouldn't get you very far. Sorry.
Oh, the work of home ownership! I don't even see a break in sight, let alone the end! Like Adam always says, that's why a mortgage is for 25 years. Maybe in 25 years we'll have it the way we want it. But then again, who wants a 25 year old bathroom? Ah, it really will never end, will it? It's a good thing we actually enjoy it!
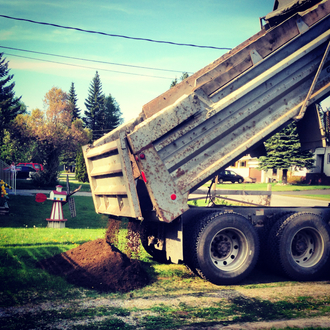
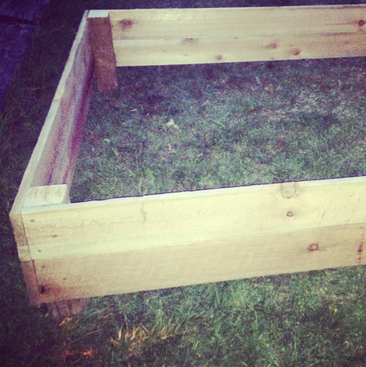
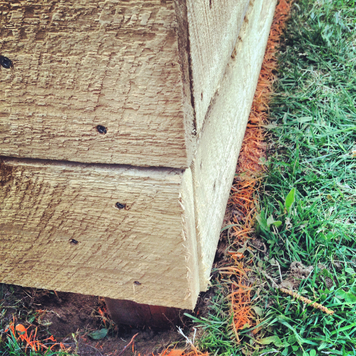
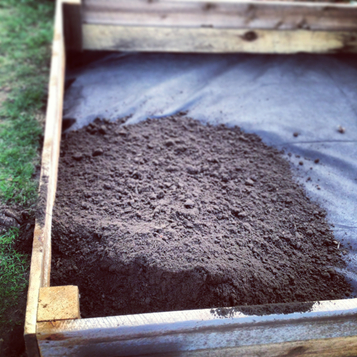
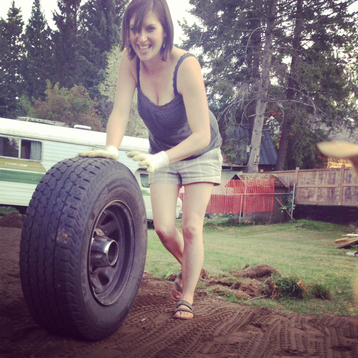
Thanks again for reading! Jena xo Friday night. 6 o'clock. Most would be celebrating the start of the weekend. Not us! We're getting half a dump load of top soil dumped on our driveway. On a whim, I decided I wanted to get the garden in this weekend or sometime during the week. I made these great raised garden beds last week, and with the great weather, I really, really wanted the garden in. They just looked so naked.... I'm a huge fan of shopping local, but you know your small town stores have some stocking issues when ALL the hardware stores didn't have any six foot- 1x6's. Well, I held to it, and managed to still shop local when I went straight to the source. I hit up one of the local lumber mills in town, and had the owner himself hand bombed the rough cut lumber right into my car. Talk about killer service! Not to mention, it was less than half the price of what I was expecting it to be. (See my previous post, 'You Aren't Just a Number' at http://www.aestheticadesign.ca/1/post/2012/02/you-arent-just-a-number-keeping-it-local.html), So the call was made and suddenly, we had dirt on its way. Not sure if I mentioned it was 6 o'clock at night.... We were so not ready for the dirt; we didn't even have the garden beds placed! So we got to work digging out the border and the posts so we could level the beds. Then we laid some filter cloth, which hopefully limits the amount of weeding I'm going to have to do! We filled the garden beds with about ten wheel barrows full each, and now we are ready for some serious planting! So that was great, getting that task crossed off the to do list, but I should have known that half a dump truck load was going to be more than enough for those two little raised garden beds. Next thing we know, we are levelling out our entire backyard. The yard was so full of ruts and hills; you'd be walking back from the fire pit, hit a dip and be face first in the grass. Or I would be anyways. I'm not the strongest girl in the world, but I do have a 26 pound 11 month old. Rolling a 50 pound tire around our entire yard to level it out, after shovelling half a dump truck load of dirt, was no big deal. Ok, I only did half of a half of a load. Maybe a little less.... But regardless, we got it done! So, the moral of the story is: yes, we are insane, but it sure feels good to get our home in order.
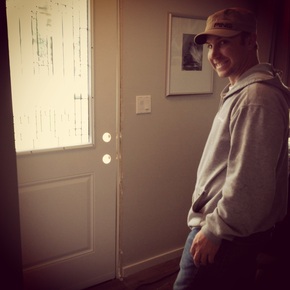
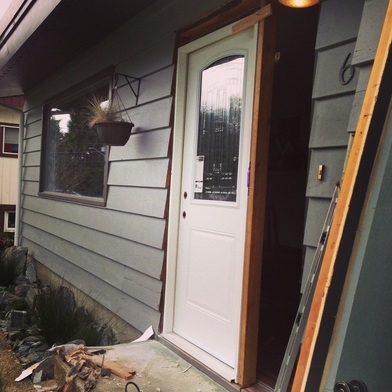
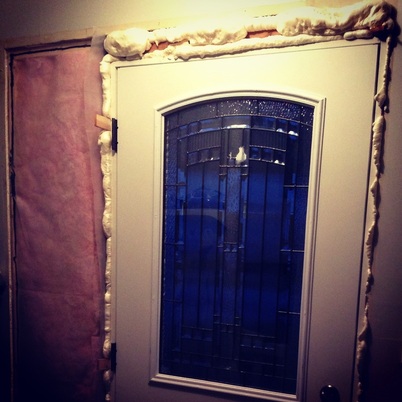
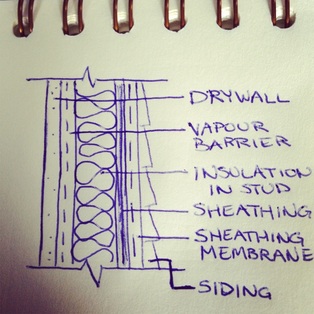
It's a never ending journey, and a lot of hard work, but I've got great company and help! Today we are installing our brand spanking new door. I'm pumped. It has a dead bolt! Not that I'm all freaked out of having intruders, but I did watch Mr. Brooks a year ago... Creepy! Besides having a dead bolt, it is an insulated, energy star door, as compared to the previous hollow, warped, wood and interior "front door". How it lasted 40+ years, I do not know. It's funny how when appearances can be deceiving when it comes to houses. Sure, the original door looked semi-brutal, but it worked. But when we took the trim down, we realized just how bad it was. Basically, the lack of insulation and sealing equated to about a square foot hole in the side of our house. Conveniently located behind some fancy trim. No wonder our heating bills were so high this winter! We had always felt a draft, so Adam had put in weather stripping, which definitely helped. But little did we know about the issue behind the trim. When we got our energy assessment done on our house, the doors were one of the biggest heat losses. Now we know exactly why. Sometimes a little research will go a long way in uncovering some issues in your home. Yes, I was excited to just have a prettier door, but finding this out really makes me excited. Two birds with one stone! And those who know me, know my issue with birds, so we're laughing now! Now that we've installed the door, we know it's done correctly when it comes to being insulated and sealed. It amazed me the things that "home builders" miss. If you look really closely at the picture above, you can see tiny pieces of pink insulation. That's ALL the insulation we had in our original door. Adam beefed that up just a little bit. (and by a little, I mean a lot) All that stuff that looks like clouds coming through the sides of the door is expanding spray foam to avoid the hole-in-the-wall scenario we had going on before behind the door trim. Shrek: For your information, there's a lot more to ogres than people think. Did he say OGRES? He meant walls. Walls are like onions. Lots of layers. If you are missing one of these layers, it could mean big problems. More of that to come..... Thanks for reading! xo Jena
|
Ants on a BlogBy Jena Keenan Categories
All
Archives
November 2017
|
