|
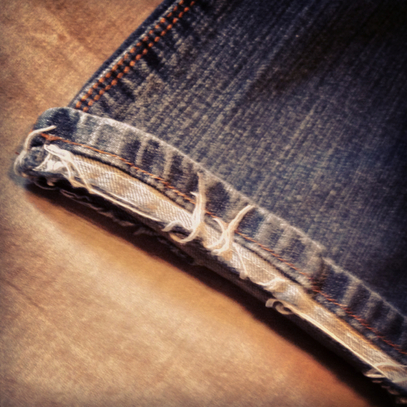
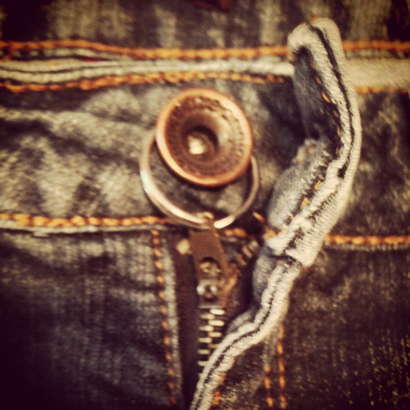
Today, I was going through clothes that just don't work for me. I came across these jeans which were comfortable and had fit well but I attempted this awesome hemming technique that I was sure I had thought of on my own. I had heard about a way to keep the old hem on your jeans, and it totally came to me on how to make that happen. All you have to do is cuff them (see a tip below)** and sew as close to the original hem as possible.
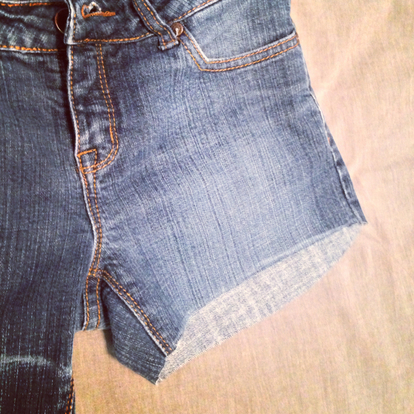
It worked amazingly! Only one problem. **I had hemmed them where I usually cuffed them to wear them with a cuff. So the jeans were now about half an inch too short. You need to cuff them where the original seam SHOULD be once you are done. Total bummer. Lesson learned anyways. Two pairs of jeans later... Also, it turns out that I totally had the technique figured out as I kept seeing pins on "how to hem your jeans while keeping the original seam". Of course, minus the measuring part. 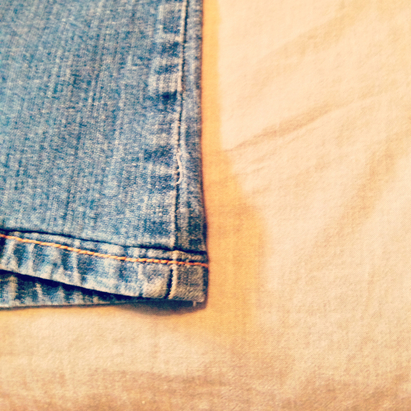  So, these jeans were ready to be tossed into the bag headed for the thrift store, until I saw another idea, which I will post about later, which needed the legs of an old pair of jeans. I figured, why not turn these old jeans into two projects! Reduce, REUSE, recycle, right? Besides, it is really hot out these days, and who doesn't need a pair of short shorts for the summer days? Plus, I had that Brett Eldridge song in my head... Had to post it, in case you don't know the tune. Had to laugh at the video though, do some girls really make eyes like THAT?? I'll have to ask Adam if I ever batted my eyelashes that dramatically at him! 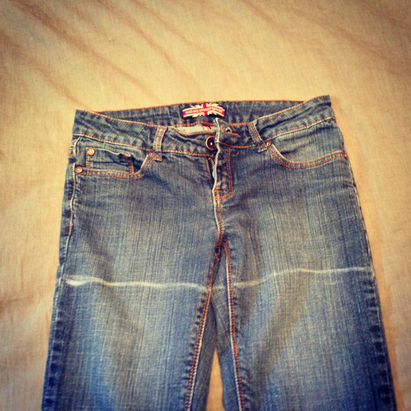 I was really hoping I'd cut those shorts just right... So I chalk-marked them up while I was wearing them on just how short I wanted them to be. Just a tip about cutting jean shorts: keep the backside of the shorts about an inch longer than the front to compensate for the booty. When I marked the jeans on me, I awkwardly marked all the way around my leg, and so that naturally took into account the extra length needed for my butt. You can see it in the next picture.
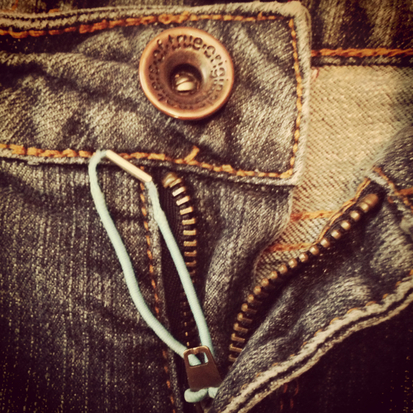
Next issue with these jeans was the zipper. It never stayed up. And NO ONE likes a pair of jeans that always has you paranoid like white jeans around a certain time of the month. This is also why these jeans were my first experiment with my original seam hemming technique, that turned out to be quite the norm.
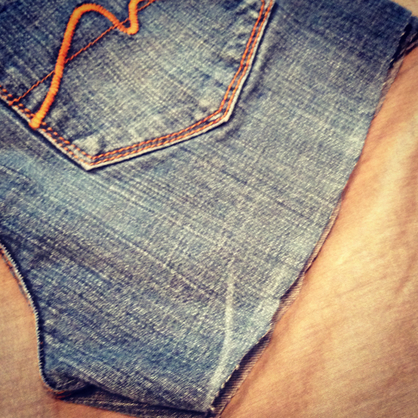
And, as you can see, here are my legs modelling the completed Project Short Shorts. I added a fold to the jean shorts because short shorts can never be short enough!  Now that I've got my new shorts on I feel like doing some summer living! Beach time? I think so! Happy Summer Days! Jena xo
0 Comments
From yesterday's ordeal with the random plumbing pipe that nearly put the shelf hanging project on the back burner, there are a few things I'd like to point out.. A. That was a run on sentence. And B. Something you think should be simple is not usually as it would seem. Which lead me to a eureka moment. This is why women complain about men never starting projects! (Not me though, of course!) Really, it's because men are smarter than we give them credit for, and they know how NOT simple our silly requests are. Yup, I said it. I wouldn't be successful with like 83% of my projects if it wasn't for Adam. So thanks, baby! I love you!
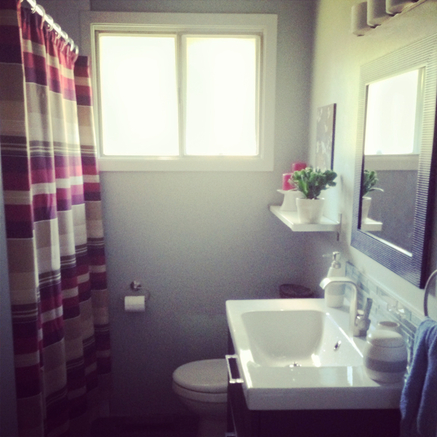 Minus the two screw holes that hit the pipe and the place where my drill slipped and hit the wall, that now needs touching up, this is the completed project! Not bad. But man, that was a lot of effort for a shelf that just hold plants and candles! Happy shelf hanging! Jena xo  I fully enjoy doing projects around the house. It's more fun when I do them with Adam, but sometimes, I just gotta do it myself, for whatever reason. Bragging rights, mainly. That, and my brain is constantly coming up with ideas and make-work projects that, if Adam knew about it, he'd probably kibosh it. Often for a good reason. I usually figure out the good reason after I've started, and then I just HAVE to finish it, as over my head as it might be. To give you an idea of what I'm really referring to, is what I got up to today.... 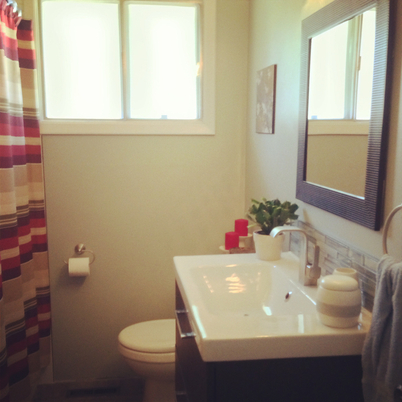 Our main bathroom This is our main bathroom. I love it, and as small as it is, it surprisingly works. We installed this IKEA Godmorgen vanity in place of the turquoise sink, which instantly updated the space by about fifty years. I figured that a nice little IKEA shelf over the toilet would be a great place to display some candles and a plant, because, who are we kidding? That plant on the vanity is only there for the photo and those candles straight up don't fit on the toilet.
 Seahorse Shower Curtain design by Thomas Paul from: Burke Decor LLC Besides, how hard can installing a shelf be... Besides running around the house trying to find the level and anchors for the screws. I found all the gear and set to it, while the babe was having his nap. I love nap time for my crazy projects! 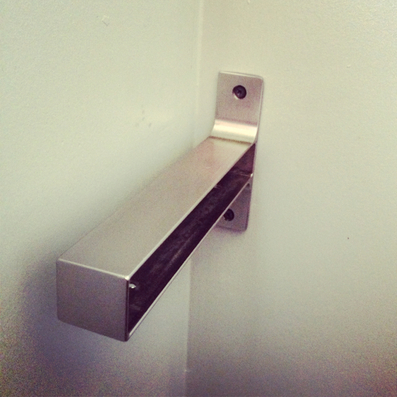 Here is the first bracket. Clearly, off to a good start! Next bracket... Not so simple. Whyyyyyyyyy? 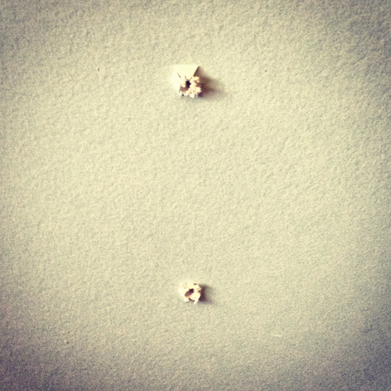 I was just drilling happily away and bam! Hit something hard. Very hard. Called Adam at work and had to explain what I was up to (was hoping to surprise him with my handiness) and ask what this impenetrable thing in the wall might be. Notice though, there are two holes. If at first you don't succeed, try, try again, I always say. Maybe the drill was dying, so it wasn't going through the stud that I didn't think was there... Who knows! After the second attempt though, I realized it was something pretty solid. I actually called the dad in law first, but he wasn't home, so I had to wreck the surprise and called Adam. Darn. Turns out, it was, in fact, some plumbing pipe. Darn, again . That really puts a damper on my shelf hanging plans because now I need to chop down the shelf, and blah blah blah. Simple project turned mission. I should have just stuck to vacuuming today. Should I attempt moving this awesome, but overloaded Umbra shelf that is currently at our entry, to the bathroom for towels instead of sunglasses? Or just call it a day? Maybe I should try to finish some of my unfinished projects before I start another one. Lesson learned... 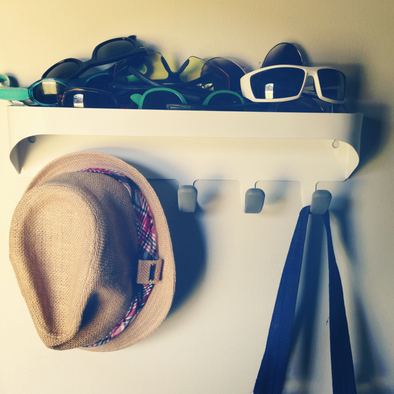 To Finish and/ or Fix BEFORE I Start Something New
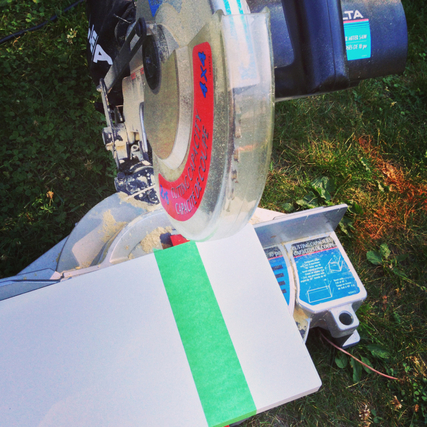
Adam will be happy to see me attempting to finish those ones before starting a new one. And so will I. I know it's an issue I must work on. And so I work on! Happy Reading! Jena xo  Coniston Parchment Towels design by Designers Guild - $15.00 from: Burke Decor LLC For those of you who read about my zoo construction last week, I have to show you the grand opening of the teddy confinement chambers... aka the zoo. 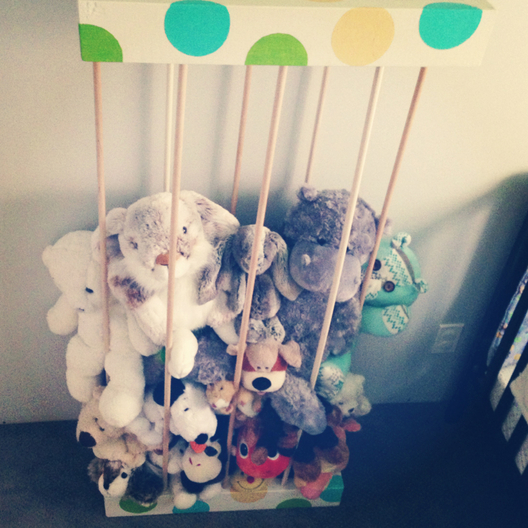 The caged mayhem Thank you for voting on the colour choice! It became a combination of them all, and more, except for the black- brown as it just wasn't colourful enough for this project. Although I have to paint the bars still... What do you think? Brown- black or silver?? I will get to that later, once I peel those stupid stickers off the dowels. Seriously, who thought of that? I actually was contemplating sawing the dowels shorter as to avoid getting those stickers off. Laziness won, and I just left it for now.
So, there is the basically completed project! I hope you like it, and I hope those animals don't mind the crowded conditions. We would never get away with that in real life! (Nor should we....) Jena xo I like to think that behind every man is an organized woman. That, or a frustrated man because he can't find anything because she is just not organized yet... As is our case. I'm getting there. But since moving in two weeks before the baby was born, its taking me a lot more time to get the house just right when it comes to what goes where. I hope that justifies the fact that the plates change locations bi-weekly. (Love you Adam!) But honestly, storage has been a problem in my organizational quest. The kitchen doesn't have much, and so something had to be done. 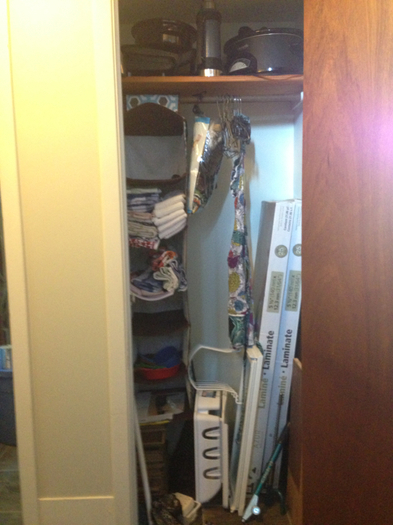 This was our whatever closet Our whatever closet consisted of just that. Whatever fits, whatever didn't have a place yet, and whatever else you could think of. Extra flooring, the crock pot, tea towels... Whatever. It became my mission to convert this into our kitchen pantry. Even though it was down the stair from the kitchen. A girl's gotta do what a girl's gotta do! 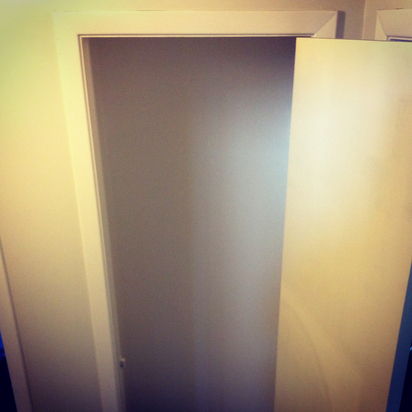 So I stripped it down to nothing and started with a few coats of paint. I find that It's best to start with a blank canvas and go from there. 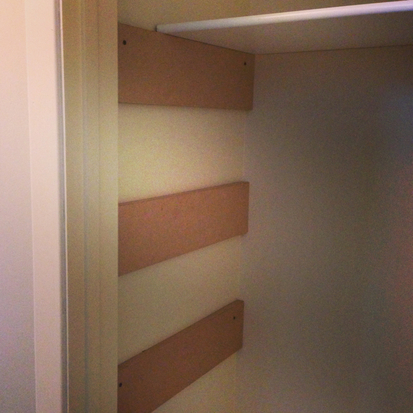 We had some random MDF lying around so I chop sawed it up, and it became the supports for the shelves we picked up this weekend at Home Depot. Side note: Did you know Home Depot can make the cuts for you? I told the guy that the shelves had to be 30.5" wide and boom. Done and done. Which really helps because I don't have a table saw. Yet.... 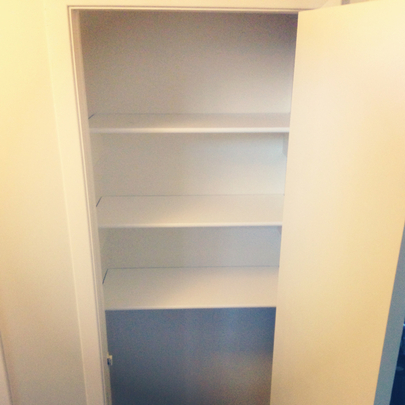 Ta-Da! I painted the MDF, and then popped the shelves in. With the help of the dude at Home Depot, my power drill, a level and a tape measure, this was what the plan became. 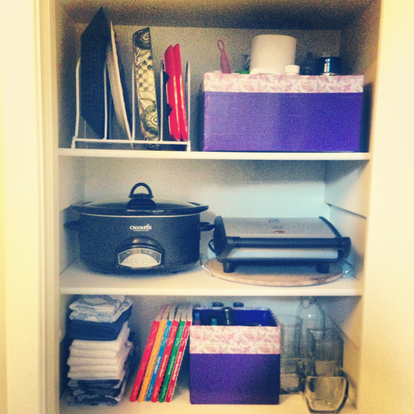 Now, I know most people don't see the insides of other people's pantries, but I'm blogging about mine, so the least I could do is make it presentable. 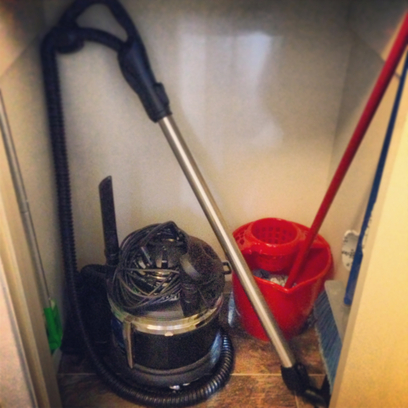 I'm also glad that our lovely vacuum cleaner now has a place it can call home. I use it every day, thanks to Bocephus, the dog that sheds garbage bags of hair. Every single day. So with my overuse of the vacuum, I had needed a place to keep it, with very easy access. Before the pantry, it lived in the spare room. Sorry company! Now, if you come to our house, you don't have to sleep next to a vacuum cleaner. (For the record, I usually moved it to the laundry room, unless you were my brother) Hope you enjoyed reading, and I hope it gives you some inspiration to clean out those skeletons or whatever in your closet. Or the old man halloween costume that still has a few years before it becomes bones. Jena xo  Rope Handles Basket design by Twos Company - $65.63 from: Burke Decor LLC As I've mentioned before, we have a numerous amount of stuffed animals. It was getting a little wild here with lions and tigers and bears. Oh my. To solve this, I decided to cage the mayhem, by building a stuffy zoo. Check out my inspiration here. It looked easy enough! Famous last words.... 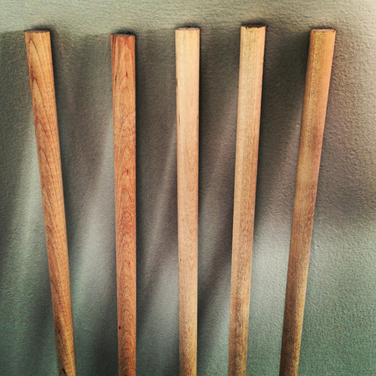 I started with the 1/2" dowels as the bars. Easy enough. But why do they have to put those stupid stickers on them? They never peal off! So after I half pealed one off, as shown below, I said, "Later." And that's another project in itself to finish in a few months or years. 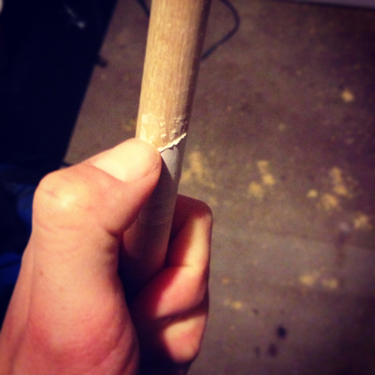 This is possibly the biggest annoyance of mine. So I started chopping the base pieces, but I wanted them with a 45 degree cut, so I got Adam to help me with that. I'm still new to using all these power tools and it just scared me a little. But I held the umbrella for him as it started to sprinkle, so I still helped! 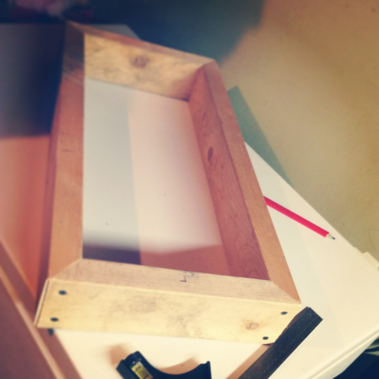 Base and/ or upper section complete Then I assembled the base and upper part of the "cage". Back on to the power tools! 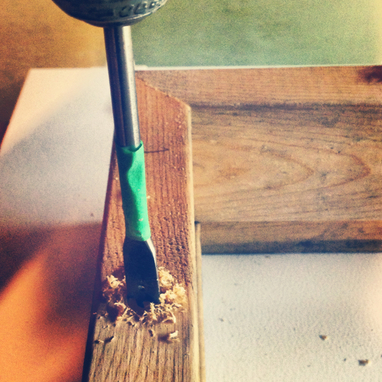 So smart. Wish I thought of it myself, but no. To help me know how far to drill the holes for the "cage cars", I used Adam's trick of taping it and drilling to that point. He's so smart! It's much more precise than eye-balling it. It definitely came together once I got the holes drilled. That actually took the longest, but only because the drill died and I had to go back downstairs every half an hour to drill three more holes. A little math practice here- five dowels times two holes each= ten holes at two- three per hour= a lot of time. 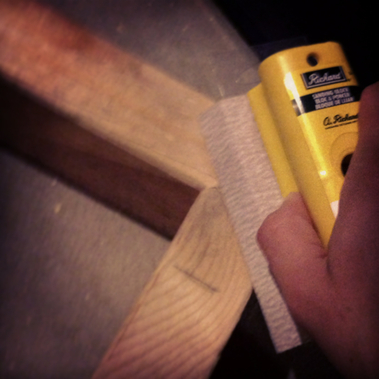 After some serious sanding to hide some of my not so epic connections, it was coming together. It also made it less sharp and just looked much nicer. 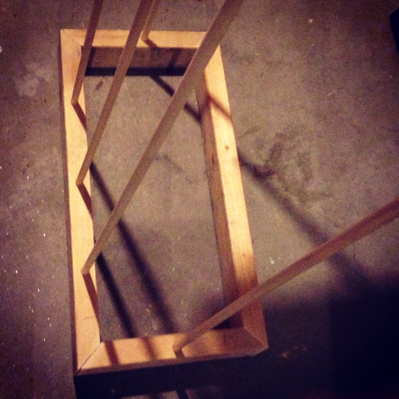 Then I popped in the dowels or "cage bars" and it became an almost completed zoo! Of course, our local* hardware store only had 5 of the 1/2" dowels in stock, so I bought them all, figuring I could rig something else up, but I'll have to go to the other hardware store for three more for the backside of the zoo. I will have to buy some wood glue too, and glue the dowels into the holes. I came down with a flu so that still hasn't happened quite yet. *I always try to shop local when possible, but sometimes it's ridiculous. Anyways, we don't want any bears escaping! 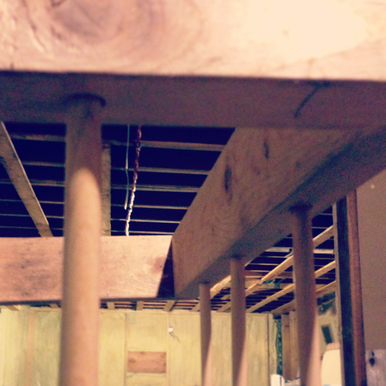 So, it is almost done, but for two reasons I have not finished. Firstly, the flu had be convinced I was dying, so it became low on my priorities. Secondly, I wanted some reader input into what color I should paint the zoo. I want to hear what you think it should be!  Thanks for reading! Hope you are having a happy Monday! Jena xo  Tiny Train Reversible Cushion design by Ferm Living - $70.00 from: Burke Decor LLC Ever thought of how many grocery bags are wasted every time you go shopping? I try so hard to remember to bring one or two of the reusable bags, but I always seem to forget about them until I am at the check out. It's an issue I am truly working on, and there is hope! I am getting better at remembering. Regardless of my attempts, I have one billion grocery bags. Yes, one billion. I counted last night....
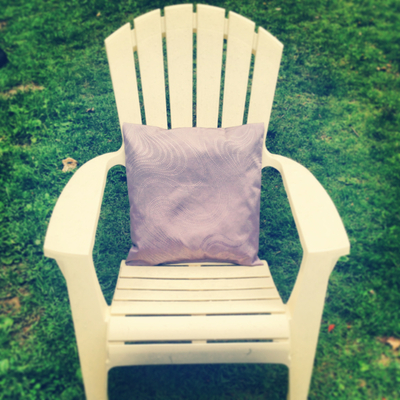
....Into this! Outside needed some pillows and voila! I doubt I need to give instructions on this one, but I will anyways in five simple steps. 1. Cut a square piece of material slightly larger than a grocery bag (Use a durable feeling material for outside) 2. Sew three and a half of the sides inside out. 3. Turn the material back to good side out. 4. Stuff with garbage bags as shown in first picture. 5. Sew shut. Done and done. Thanks for reading! Jena xo  Salamander Yellow Throw Cushion design by SunnyLIFE - $49.00 from: Burke Decor LLC  Camden Charcoal Floor Cushion design by SunnyLIFE - $72.00 from: Burke Decor LLC This is a very cool project done by my great, and clearly crafty, friends, Matt and Erin. I love the mix of industrial materials and wood. I am a huge fan of contrast, you just can't go wrong with it. Black and white, yes and no, hot and cold. Classic examples. Kind of sounding like Katy Perry there. 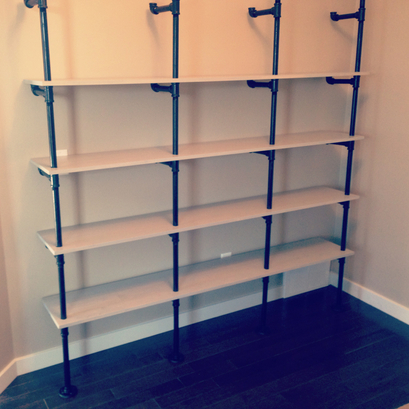 Matt send me this picture below, asking what to do with all these pipes, and immediately, I thought of shelves, which is exactly what they were planning. Great minds definitely think alike. 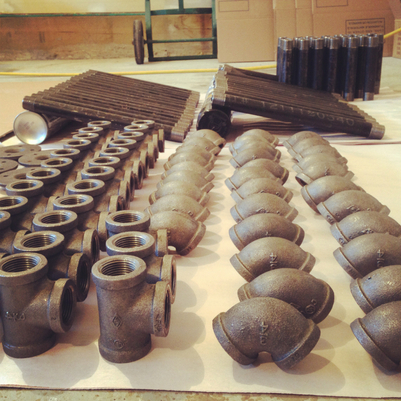 Since this was a project done by Matt and Erin, I had some very serious questions for them. Jena: So all in, about how much do you think this cost you? (Approx?) Matt: $557.56 Jena: Breaking it down, what was the cost of the plumbing supplies? Matt: ~$320. ¾” T’s, 90’s, Flanges, and of course.….6” and 12” nipples. Jena: Big nipples. 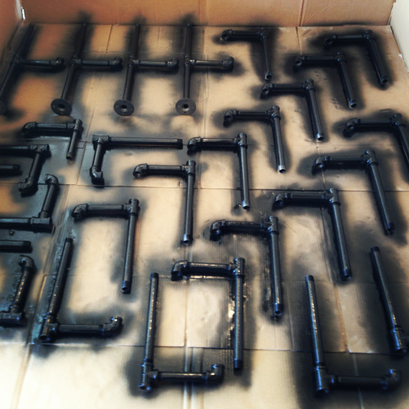 A quick spray paint job turns these industrial plumbing pipes into something a little more. Jena: What was the cost of the wood? Matt: ~$125 Pine, pre-sanded, tongue and groove veneered. After much searching I selected veneered wood as it seems the most stable and least amount of prep time. It also provides an interesting look with all the random grain structures. Jena: Well, it looks awesome, that searching paid off! 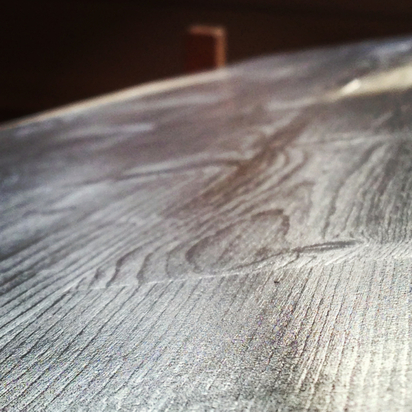 Lovely grains in the wood Jena: What about paint & other stuff? Matt: ~$110 Jena: What paint (and other stuff) did you use? Matt: 1 Coat - Minwax Water Based Stain, White base with 7 shots of black. 3 Coats - Varathane Semi-Gloss Polyurathane 2 Coats - Tremclad Gloss Black Spray Paint (pipe) 220 Grit Sandpaper Tack clothes Foam Brushes Staining Sponges Jena: Good to know, that lays it out well. Copy and paste. Shopping list done! So, where do I pick up the supplies? I mean, where did you pick up the supplies? Matt: Plumbing - Emco Supply Wood – Windsor Plywwod Paint & Others – Your local hardware store 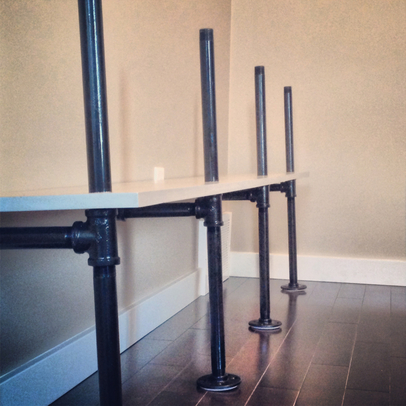 Coming together nicely Jena: How long did it take you? This includes beer drinking and breaks... Matt: Probably about 40 man and lovely wife hours! Jena: Any challenges? Matt: Get yourself 4 hands and 2 less beers for assembly. Years ago I swore I would never buy plastic anchors again. Purchase good wall anchors preferably made with metal components. My first ones were plastic junk and blew apart….again. Jena: Are there things you might do differently the next time? Matt: Lights are always fun. It would have been nice to run some wiring through the piping and have overhung accent lighting on the books. It can still be done ;) Because it is 9 feet high, with all the arms are cantilevered, it could have been anchored to the wall somewhere in mid-shelf. A good engineer would have done a free-body diagram and figured this out first! Jena: Any Tips? Matt: Make sub-assemblies like in the photo. Final assembly will be much easier with less chance of wrecking walls and floors. 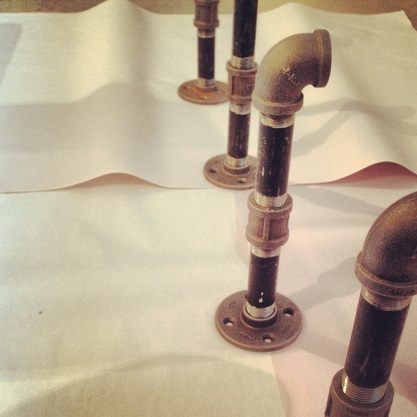 Make sub-assemblies. Great tip! Jena: That's a great tip, I probably would have thought of doing that after I finished putting it all together and my walls needed patching. Any other tips? Matt: Purchase all the gas fittings from one supplier to keep the assembly consistent (they are all NPT thread but the length varies) On a smaller shelf, to save some $, you could use ½ piping. Measure, measure, measure…….measure! I have about a hundred more tips but I don’t want to ruin the excitement of your own build. 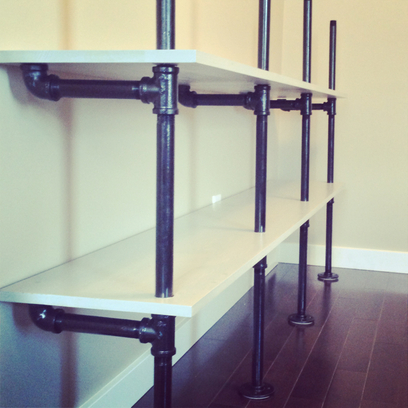 Jena: So after it was all finished, what was your favourite part about it all? It obviously looks really great! Matt: I love learning how to do stuff. This was my first wood working attempt and it turned out as envisioned. Jena: Your first?! I'm impressed. Clearly, it comes pretty natural to you. Is there anything else for next time? Matt: If it was a center piece, display shelf, or focal point of a room, I would introduce different shelf spacing. This would provide a home for the mixture of art, televisions, flowers, and storage boxes we all have. Jena: That would be really cool, I just might have to either try it out or just get you to make me one! What was your inspiration for this project? Matt: I finally remembered what my inspiration was…..the always overpriced ($1928.69 USD) and often under constructed Crate and Barrel shelf (pictured below). I almost knocked it over checking the price tag so how could I ever put books on it? 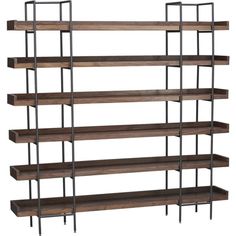 Beckett Shelving Unit by Crate and Barrel Jena: Sorry, Crate and Barrel! Looks like handcrafted wins out! This has definitely given me an idea for a piece I'd love to have in my living room! You guys did a great job, and I can't wait to see it in person! 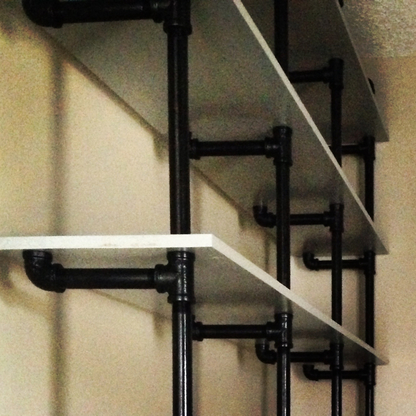 The masterpiece! Huge thanks to Matt and Erin for sharing this project with me, and
I look forward to seeing more! Stay tuned.... Any projects you have that you'd like to share on my blog? Let me know! And thanks again for reading! Jena xo
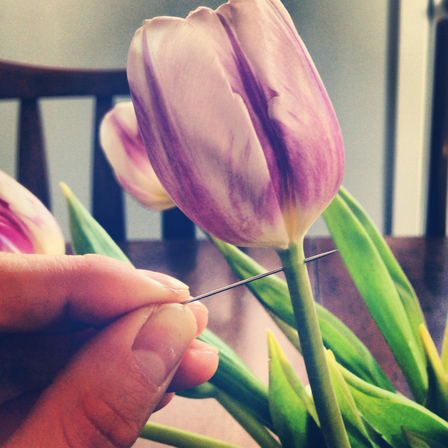
Literally overnight, they will be standing upright. Just a quick little tip for those who love having real flowers in their house. It's especially convenient for staging house over a period of time. Make those babies last longer!

On the topic of tulips, this is one of my favourite things I inherited from my grandparents. It's a picture of the tulip fields in Lisse, Holland, where my Oma is from, painted on a piece of wood.
Very rad and vintage, if I do say so... 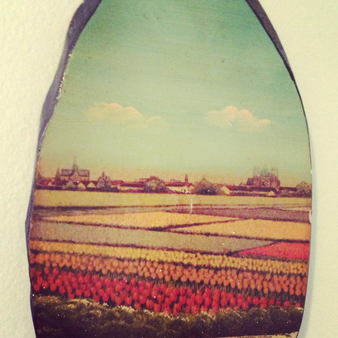
Happy Extended Tulip Loving!
xo Jena
Lately, I've had a slight obsession with jute. I love it. It has such an earthy texture, and it gives off a great beach vibe. Now that it's feeling like summer, what could be better than that? I first saw a pin on Pinterest that covered an old vase with twine, and thought it looked pretty sweet. So then I, of course, got out the hot glue gun and a roll of jute, and this is what my result was.  My First Jute Creation For the record, wrapping vases in jute takes way longer than you'd think. 'It's just wrapping a vase with twine', you say? Ya... 2 hours and 5-10 hot glue gun sticks later, it's wrapped! Maybe there is a better way... 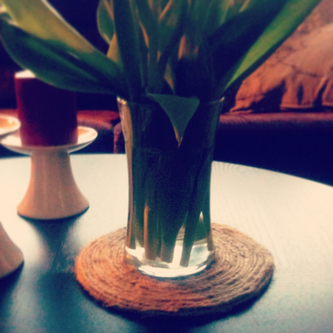 Next up, came the pot mats/ coaster things. I'm not 100% sure of the proper name. In this case I'm going to call it a large scale coaster. Adam calls it a center piece cushion. It's like spatula vs. flipper debate. Each to their own. 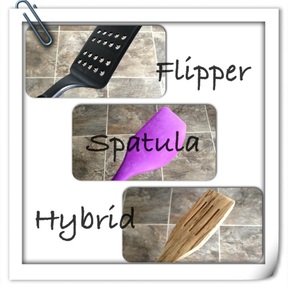 For those who were wondering ;) Next, I came up with the very original idea to frame a mirror I had inherited in jute. Then started finding tons of pictures of mirrors framed in jute. So, maybe it wasn't a totally original idea, but one of the mirrors I saw was going for $322. I get that it's the man hours that is what makes it so expensive, but I've got man hours, and I'd rather keep my $322. I'm guessing this cost me about $5 to make. Score! Only downfall? I totally burned myself with the hot glue gun. Again. 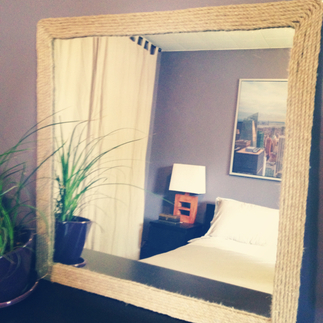 Jute mirror Admittedly, I might be going a little jute crazy; now I've covered a few vases, made a bunch of sets of coasters, pot mats, magnets, etc. I've got so many, I should probably start selling them. For less than $322. Stay tuned for an Etsy shop...? 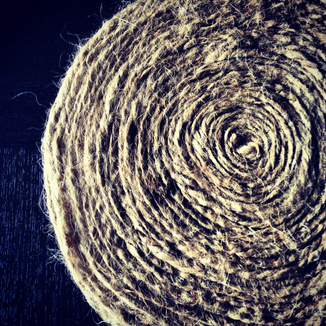 Jute coaster Thanks again for reading! I've been loving the feedback I've been getting; it motivates me to create and write more. So thank you. Jena xo  Marseille Knot Door Stopper or Bookend design by Twos Company - $45.00 from: Burke Decor LLC |